5 Crucial Steps Professionals Take When Installing a Roller Door
Installing a roller door is more than just fitting metal into an opening. The process requires precision, planning and professionalism.
A poorly executed installation can lead to ongoing maintenance issues, safety concerns and unnecessary costs.
Comprehensive Site Assessment & Planning
Before any physical work begins, professionals conduct a detailed assessment of the installation site. This ensures the space is suitable and the installation will meet all operational and safety requirements.
What professionals check:
-
- Opening measurements: accurate width, height and depth
- Headroom and side clearance: enough space for guides and mechanisms
- Structural conditions: integrity of walls, lintels and mounting points
- Obstructions: nearby windows, wiring, plumbing or shelving
- Usage requirements: frequency of use, motorisation needs or insulation
A clear plan also includes:
-
- Selecting the appropriate door size and specifications
- Identifying any reinforcement needs
- Reviewing regulatory or insurance requirements
Taking the time to plan prevents costly adjustments later and ensures the installation proceeds smoothly.
Choosing the Right Components
Not all doors and hardware are created equal. Professionals carefully select each component to ensure optimal performance for the intended application.
Key Components Installers Consider:
-
- Door curtain: thickness, material, finish and insulation
- Tracks and guides: durability and alignment features
- Springs and counterbalance: matching door size and weight
- Fasteners and fixings: corrosion-resistant and compatible with the structure
- Motor and controls: for automated systems
Selecting high-quality components helps:
-
- Improve longevity and reliability
- Reduce maintenance costs
- Enhance safety and ease of use
Professionals often work with trusted suppliers and choose parts that comply with relevant Australian standards.
Preparing the Site
Effective installation depends on a sound foundation. Professionals prepare the site to ensure the structure can support the door and that the opening is ready to receive the components.
Preparation Tasks Include:
-
- Clearing the area: removing debris, old doors and obstructions
- Checking framing: ensuring walls and lintels are square, plumb and level
- Reinforcing structures: adding supports where necessary
- Treating surfaces: applying protective coatings to steel or timber
This preparation phase is crucial. Uneven openings or weak supports can result in misalignment, rattling doors or premature wear. Taking the time to prepare builds a stable base for the installation.
Precision Installation
With the site prepared and components ready, professionals begin the installation. This stage is where experience and attention to detail have the greatest impact.
Installation Steps:
-
- Setting up tracks and guides
- Ensuring vertical and horizontal alignment
- Using levels and plumb lines for accuracy
- Setting up tracks and guides
-
- Mounting counterbalance systems
- Installing springs or weights according to manufacturer specifications
- Adjusting tension to match door weight
- Mounting counterbalance systems
-
- Fitting the curtain
- Lowering the slats into tracks
- Securing with appropriate fixings
- Fitting the curtain
-
- Adding motorisation (if applicable)
- Installing operator units and wiring to power source
- Setting up remotes and safety sensors
- Adding motorisation (if applicable)
Throughout this process, professionals:
-
- Use specialised tools for exact alignment
- Protect surfaces and components from damage
- Confirm that moving parts operate freely and safely
A correctly installed system won’t bind, grind or fail during use.
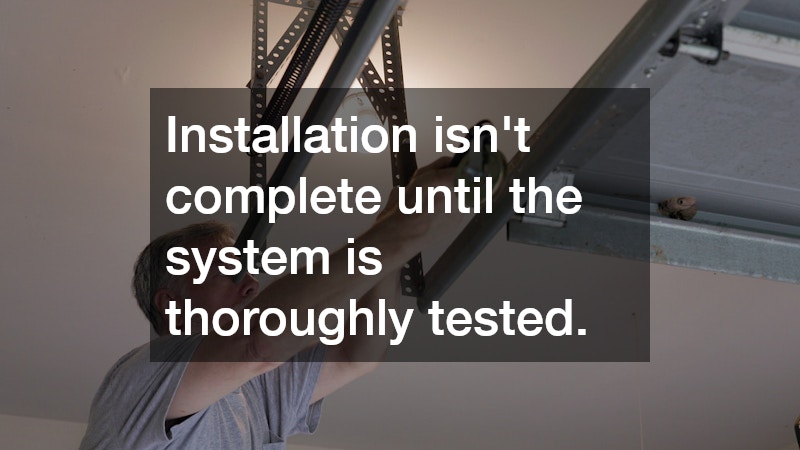
Testing, Fine-Tuning & Client Instruction
Installation isn’t complete until the system is thoroughly tested. Professionals conduct a variety of checks to confirm the door works reliably in all scenarios.
Testing Checklist:
-
- Manual operation: smooth travel without resistance
- Automatic operation: sensor response, opener performance
- Safety features: auto-reverse, obstruction detection
- Balance and tension: door stays in position when partially open
- Noise levels: smooth and quiet movement
After testing, installers fine-tune the system:
-
- Adjusting spring tension
- Realigning tracks if needed
- Programming remotes and control panels
Once everything is working perfectly, professionals take time to show the client how to use and maintain the installation.
They will explain:
-
- Safe operation procedures
- Routine maintenance tasks
- What to do if issues arise
- Warranty coverage and support options
This ensures owners feel confident using their new installation and understand how to keep it operating well.
Why Professional Installation Matters
Installing a roller door is not a simple DIY project. It involves technical skills, knowledge of materials and an understanding of safety standards. Here’s why professionals make the difference:
-
- Accurate alignment: prevents wear and tear
- Structural assessment: avoids future damage
- Safety compliance: meets local building regulations
- Warranty adherence: many manufacturers require professional installation
- Long-term performance: reduces breakdowns and repairs
Professionals also adapt to unique site conditions that may not be obvious at first glance. For example, older buildings might have uneven openings or hidden obstructions that require creative solutions.
The installation of a roller door involves more than measurements and assembly. It requires careful planning, quality components, site preparation, precise installation and thorough testing. By following these five crucial steps, professionals ensure a safe, reliable and long-lasting installation that meets both functional and safety requirements.